
Documents
Overview
Section titled “Overview”Store and manage customer documents from the MSPControl documentation area.
The Documents page provides a centralized file repository for your organization inside MSPControl. Use it to upload, organize, and manage operational files (manuals, exports, credentials attachments, invoices, internal docs) with consistent tagging and bulk actions across assets, users, locations, and devices.
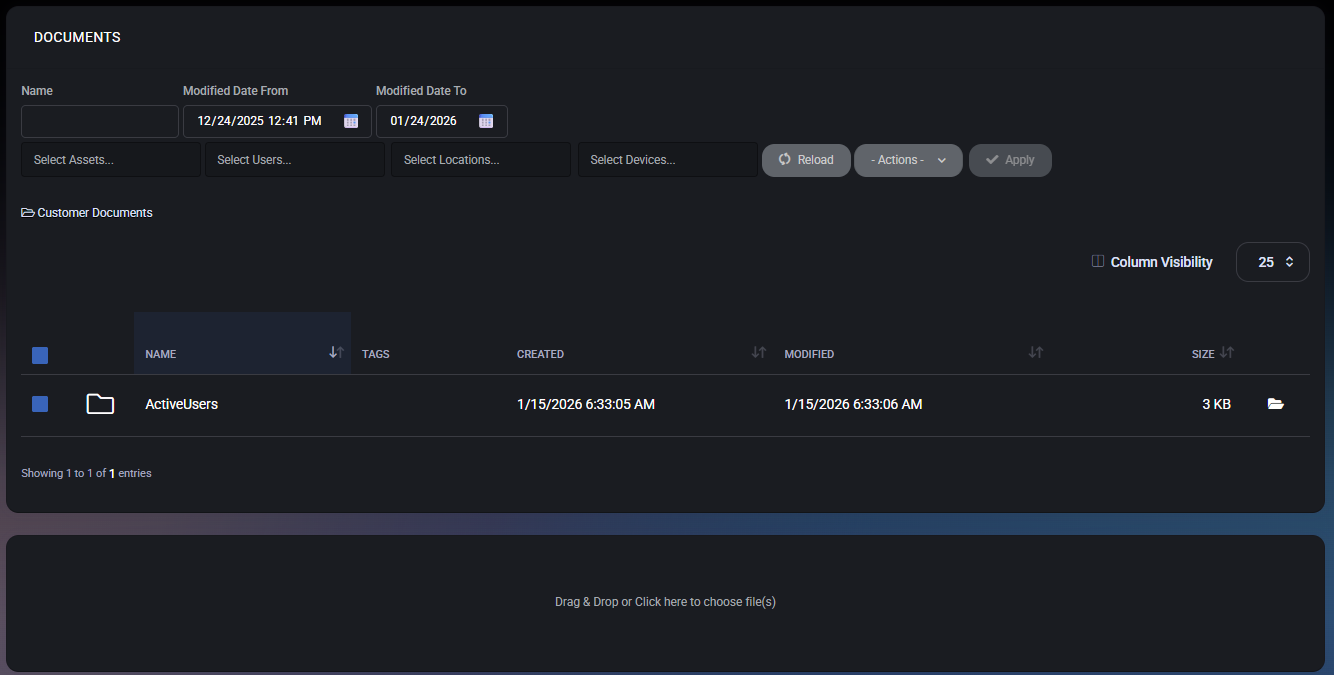
Documents Overview
Section titled “Documents Overview”This page is designed for day-to-day document handling in a customer/hosted organization context. It combines:
- Filtering by name, date range, and tag scopes.
- Folder-based organization (for example, “Customer Documents”).
- Bulk tagging across Assets, Users, Locations, and Devices.
- Fast uploads through a drag-and-drop upload panel.
Typical use cases include keeping customer-facing exports, operational runbooks, device/service documentation, and internal notes in one searchable location.
Filters and Search
Section titled “Filters and Search”The top section contains filters that narrow down what is shown in the documents table. Use filters to quickly locate files in environments with a large number of documents.
Filter Fields
Section titled “Filter Fields”- Name – Searches documents by file or folder name. Use partial matches to find items quickly.
- Modified Date From – Shows only documents modified on or after the selected date/time.
- Modified Date To – Shows only documents modified on or before the selected date/time.
- Select Assets – Filters documents by associated Asset tags.
- Select Users – Filters documents by associated User tags.
- Select Locations – Filters documents by associated Location tags.
- Select Devices – Filters documents by associated Device tags.
Filter Behavior
Section titled “Filter Behavior”- Date filters are most useful for finding “recently changed” documents (for example, files updated during an incident or rollout).
- Tag-based filters help you locate documents relevant to a specific asset, user, location, or device group.
- Combine Name + tag filters for fastest results in large repositories.
Toolbar Actions
Section titled “Toolbar Actions”The toolbar provides quick operational controls for working with the list.
- Reload – Refreshes the list and reloads current filter results. Use this after uploads, folder creation, or bulk actions.
- Actions – Opens the bulk actions dropdown (tagging, folder creation, deletion).
- Apply – Executes the selected bulk action for all checked items in the list. This button is typically disabled until:
- at least one document/folder is selected, and
- a valid action is chosen from the Actions menu.
Documents List
Section titled “Documents List”The main table displays folders and documents currently available in the repository.
Folders
Section titled “Folders”Folders group related files and help maintain structure (for example, a “Customer Documents” section). Folder entries are displayed as rows and can be selected for bulk actions the same way as documents.
Columns
Section titled “Columns”- Name – The document or folder name.
- Tags – Tag context applied to the item (Assets/Users/Locations/Devices).
- Created – When the item was added to MSPControl.
- Modified – Last modification timestamp.
- Size – File size (folders may show blank or a summary depending on implementation).
Row Actions
Section titled “Row Actions”Each row can include quick-access icons (for example, open/download). Behavior may vary by role and permission level, but typically includes opening a folder, accessing a file, or performing item-specific actions.
Pagination and Page Size
Section titled “Pagination and Page Size”- A page size selector (for example, 25) controls how many entries are shown at once.
- Use a higher page size for audits or bulk operations; use a lower page size for faster navigation on slower connections.
Column Visibility
Section titled “Column Visibility”Use Column Visibility to show or hide table columns. This is useful when different teams care about different metadata (for example, hiding tags for a quick “name-only” view, or enabling timestamps for audit work).
Bulk Actions Dropdown
Section titled “Bulk Actions Dropdown”The Actions dropdown is used for bulk operations. This is most effective when managing large sets of documents where manual editing would be slow or inconsistent.
Available Actions
Section titled “Available Actions”- Add Assets Tag – Adds asset tag(s) to selected items.
- Delete Assets Tag – Removes asset tag(s) from selected items.
- Add Users Tag – Adds user tag(s) to selected items.
- Delete Users Tag – Removes user tag(s) from selected items.
- Add Locations Tag – Adds location tag(s) to selected items.
- Delete Locations Tag – Removes location tag(s) from selected items.
- Add Devices Tag – Adds device tag(s) to selected items.
- Delete Devices Tag – Removes device tag(s) from selected items.
- New Folder – Creates a new folder in the documents repository.
- Delete Selected – Deletes selected items (documents/folders) from the repository.
How to Perform a Bulk Action
Section titled “How to Perform a Bulk Action”- Select one or more items using the checkbox column.
- Open Actions and choose the required operation.
- Click Apply to execute the operation.
- Use Reload to refresh the list if needed.
Upload Area
Section titled “Upload Area”The bottom section contains the upload panel. It supports both drag-and-drop and manual selection.
Supported Upload Methods
Section titled “Supported Upload Methods”- Drag & Drop – Drag files from your desktop and drop them into the upload area.
- Click to Choose – Click the upload area to open a file picker and select one or more files.
Upload Behavior
Section titled “Upload Behavior”- Uploaded files become visible in the documents list after the upload completes.
- If filters are active, use Reload or clear filters if you do not immediately see newly uploaded items.
- Apply tags after uploading to keep documents searchable and properly scoped.
Best Practices
Section titled “Best Practices”- Create a simple folder structure (for example: Customer Documents, Exports, Invoices, Runbooks) and keep it stable over time.
- Use tags consistently so documents can be discovered from multiple angles (by asset, by user, by location, by device).
- For audits, enable Created and Modified columns via Column Visibility and use date filters to locate changes.
- Avoid using Delete Selected unless you are confident the document is obsolete. Prefer moving/organizing via folders and tags first.
- When uploading operational documentation, include a naming convention (for example: System_Area_Purpose_YYYY-MM) to simplify searching by name.