
Notes
Overview
Section titled “Overview”Configure and use Notes from the MSPControl administrator portal.
The Notes section in MSPControl allows you to create and manage text-based documentation or reminders within the platform. You can use rich-text formatting, define peer tags, and control who can view or modify each note. This is especially useful for storing server details, client instructions, or any information that multiple administrators or peers need to reference.
Enabling Notes
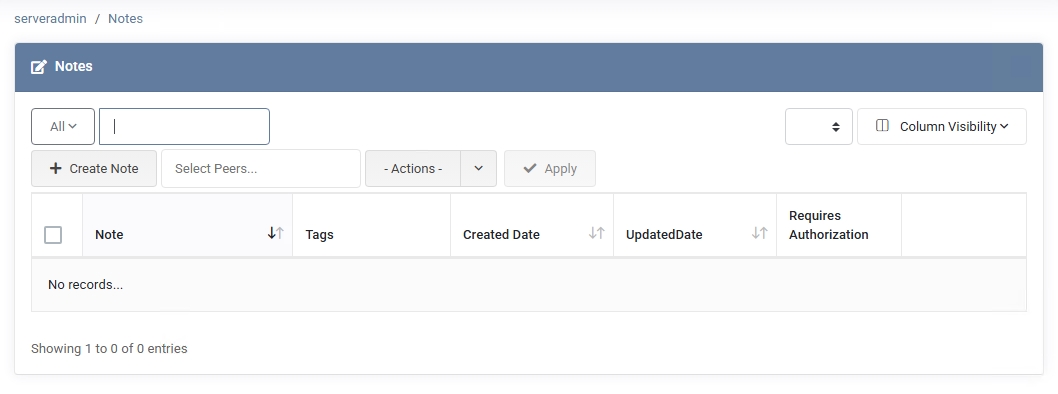
Section titled “Enabling Notes”By default, the Notes feature may be disabled. To enable it:
- Go to Settings > Policies > Documentation > Notes Policy.
- Check the box labeled Enable Notes.
- Click Save Changes or Save Changes and Exit to apply the policy.
Overview
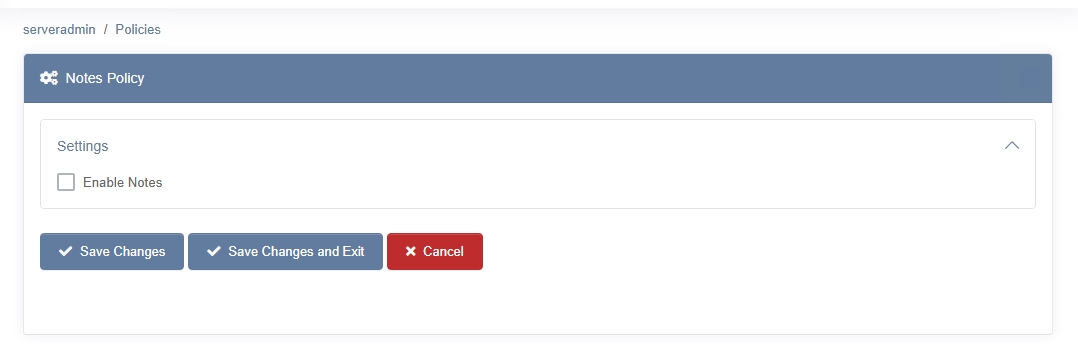
Section titled “Overview”Once enabled, you can access Notes in the main menu. You’ll see a list of existing notes (if any). Each note entry typically includes:
- Note – The main text or title of your note.
- Peer Tags – Tags indicating whose note this is or what it is relevant to.
- Create Date / Update Date – Timestamps for when the note was created or last modified.
- Requires Authorization – Indicates if extra authorization is needed to access the note.
You can use the search box or the -Actions- dropdown to filter and manage notes. Selecting one or more notes will enable additional actions in the dropdown.
Creating a New Note
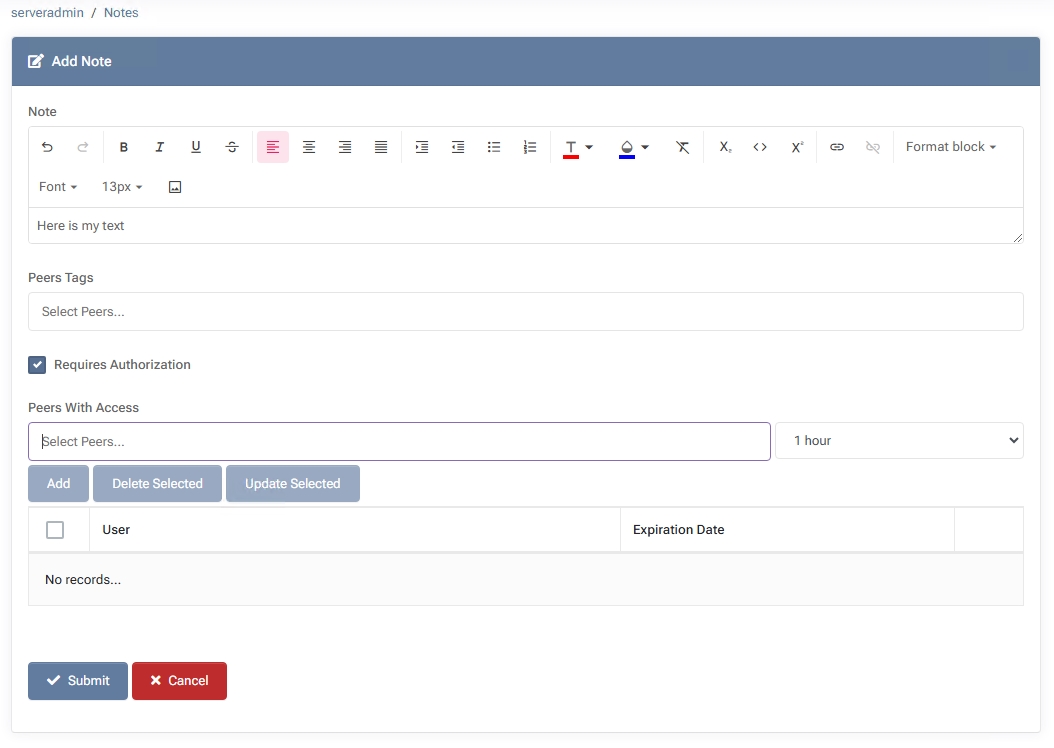
Section titled “Creating a New Note”- Click “Create Note” Opens a form where you can compose your note.
- Enter Note Content Use the built-in editor to format text (bold, italics, hyperlinks, etc.). This is especially handy for longer documentation or step-by-step instructions.
- Peers Tags (Optional) Define peer tags to indicate whose note this is or what the note is relevant to.
- Requires Authorization If enabled, the note will prompt authorized access. Only designated peers can view it after they authorize.
- Peers With Access Select peers or groups of peers who can access this note. Optionally, set an expiration date or time-limited access for each peer.
- Submit Saves your note. It will appear in the list with any peer tags or access restrictions you specified.
Actions on Existing Notes
Section titled “Actions on Existing Notes”When you select one or more notes from the list, the -Actions- dropdown offers the following:
- Set Requires Authorization Toggles the authorization requirement for the selected note(s). If enabled, peers must have explicit permission to open the note.
- Add Peers With Access Grants access to the selected note(s) for specific peers. You can also define expiration dates for temporary access.
- Delete Peers With Access Revokes previously granted access from selected peers.
- Add Peers Tag Assigns a specific “peer tag” to the selected note(s). Useful for grouping notes by department, project, or other categories.
- Delete Peers Tag Removes a tag from the selected note(s).
- Delete Selected Permanently deletes the chosen note(s). Use with caution, as this cannot be undone.
Within an individual note’s edit screen, you can also Update Selected peers to change or extend their expiration dates, ensuring time-limited access if required.
Best Practices
Section titled “Best Practices”- Use Peer Tags Strategically – Assign relevant peer tags (e.g., “Finance,” “SupportTeam”) to indicate whose note it is or what it pertains to.
- Require Authorization for Sensitive Data – If a note contains credentials or private information, enable Requires Authorization and limit access to specific peers.
- Set Expiration Dates – For temporary or project-specific notes, consider setting an expiration date for peer access, preventing stale or unnecessary data from lingering.
- Regularly Review Notes – Archive or delete outdated notes to keep your documentation clean and relevant.