Notes and Photos
The Notes tab allows administrators to create and manage password-related notes associated with the selected device. These notes may include sensitive configuration details, user credentials, or asset-specific instructions. Each note can be enriched with tags to associate it with users, locations, devices, and other assets. Notes can also be marked as requiring authorization for access, adding an extra layer of protection.
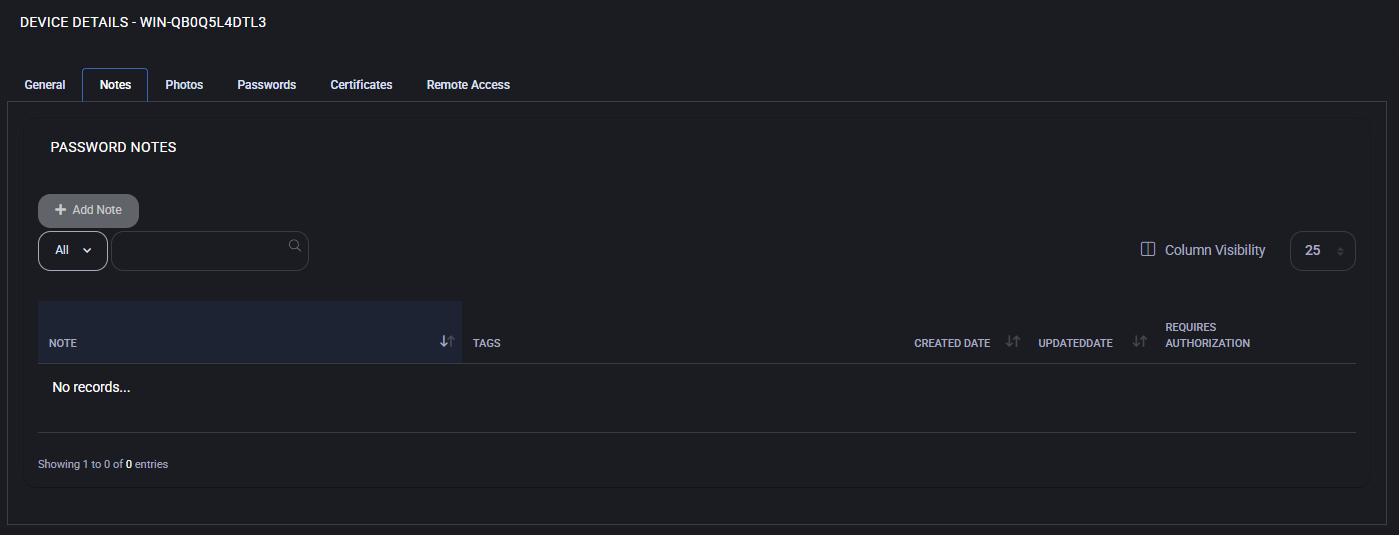
Add note
Section titled “Add note”To create a note:
- Click the Add Note button.
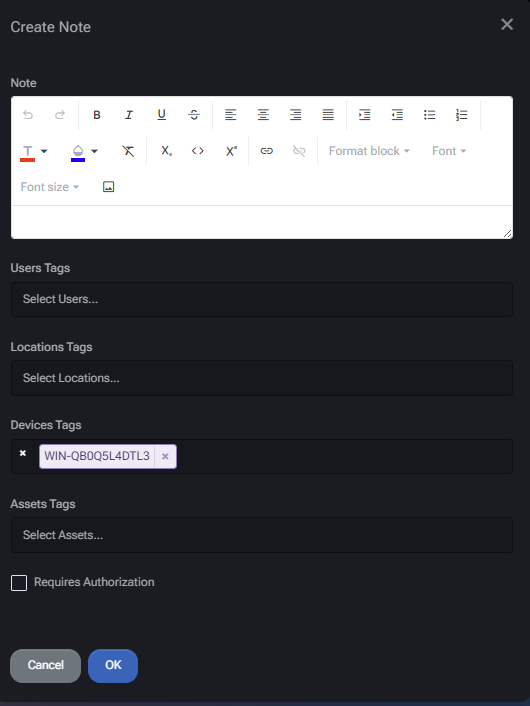
- Enter the content of the note using the rich text editor.
- Optionally assign:
- User Tags – Link the note to specific users.
- Location Tags – Tie the note to physical or logical locations.
- Device Tags – The current device is prefilled automatically.
- Asset Tags – Select related assets to link the note with.
- If needed, enable Requires Authorization to restrict access.
- Click OK to save the note.
Best practices
Section titled “Best practices”- Use clear and concise language in notes to avoid ambiguity.
- Apply appropriate tags to ensure easy filtering and contextual relevance.
- Enable “Requires Authorization” for any note containing credentials or sensitive configuration data.
- Avoid duplicating information already available in the Certificates, Passwords, or Remote Access sections.
- Regularly review and update notes to ensure accuracy.
Photos
Section titled “Photos”The Photos tab in the Device Details section allows users to view and manage photo albums associated with the device. Each album can contain one or more screenshots or images and can be access-controlled individually. Each photo album entry displays:
- Album preview thumbnail
- Number of photos it contains
- Album name (partially masked if sensitive)
- A red Request Access button if authorization is required
Create album
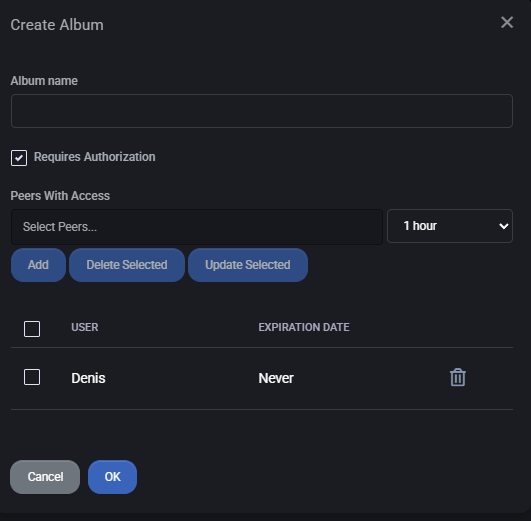
Section titled “Create album”Clicking Add Album opens the album creation dialog. The following fields and options are available:
- Album name: A required text field to name the album.
- Requires Authorization: If checked, access to the album must be requested and granted.
- Peers With Access: You can select users (peers) who should have access to this album and specify access duration from a dropdown list (e.g., 1 hour).
- Access Management:
- Add: Grants access to selected users.
- Delete Selected: Removes selected users from the access list.
- Update Selected: Updates the access expiration for selected users.
Existing access records show the username and expiration date. You can remove any user by clicking the trash icon next to their entry.
Best practices
Section titled “Best practices”- Always set meaningful and descriptive names for albums to simplify future searches.
- Use access control for sensitive screenshots and ensure expiration times are set appropriately.
- Regularly audit who has access to each album and revoke outdated permissions.
- Use tags or consistent naming conventions to group albums by device type, purpose, or location.
- Limit album access to only those who require it to reduce risk exposure.
